
Two to three salon trips a month (if not a week!) are a must for every girl. From hair treatment and blow-dry to manicure and pedicure, parlours are the ideal place to unwind while sipping on a cup of hot coffee and flipping through the pages of a magazine. The Covid-19 outbreak led to the temporary shut down of salons world over, leaving women in a state of frenzy, baffled about what to do about body hair, chipped and uncut nails, rough and scruffy tresses and the list goes on. Hence, it was not surprising when a group of youngsters recently came together to open a manicure station in the form of a cart in the United States and offered their services for free. If you are one of those who cannot live without regular salon-grooming and are stuck at home, this article goes out for you! Here is our list of how to give yourself the best at-home salon experience.
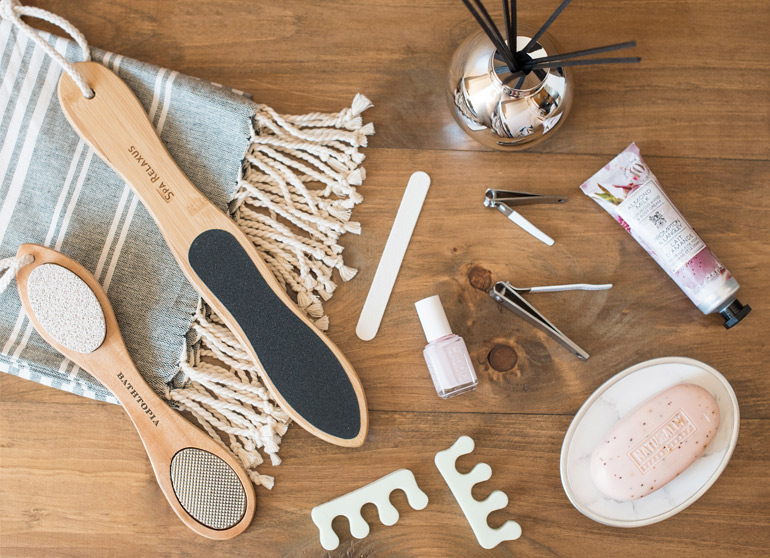
Manicure and Pedicure
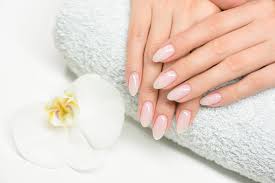

First things first! Create a spa-like feel at home by lighting up your space with freshly-scented candles and soothing music. You will need a tub, towel and mani-pedi kit to begin with. Drop a teeny bit of essential oil (lavender or peppermint preferably) for some fragrance and throw in a small amount of shower gel to make the water a tad bit foamy. Dip your feet in the lukewarm water as you sit back and scroll through your favourite celebrity Instagram accounts on your phone. Take one foot out after seven to 10 minutes, dry it well with a towel and get the process started. Cut the cuticles, clean and file the nails and brush over them for some natural shine. Note: Mini brushes come with the above-mentioned kit! Next, exfoliate using a light homemade scrub and some lemon to get rid of dead skin. One of the best homemade scrubs we’ve used is a blend of brown sugar, honey and lemon! Repeat the process with the second foot. Once both your feet are nice and clean, don’t forget to moisturize to balance out any kind of redness that may appear after all the scrubbing. Now, pick out your favourite from your nail-polish collection and paint your fingers and toes. Ta-da!
Hair colour
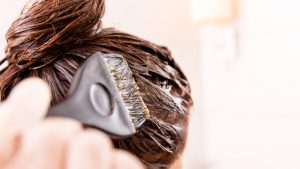

This one is tricky! Most of us chicken out when it comes to dyeing our hair at home because a lot of factors need to be taken into consideration before picking the right colour. Of course, who doesn’t want to look on-point after a fresh hair makeover? But worry not, we have you sorted!
For starters, be true to yourself. If your hair feels extremely damaged, then it is not safe to bleach or colour it at home because you might just make it worse and end up causing chemical breakage. However, if you feel like your locks are ready for some grooming, the first thing to remember is to ALWAYS follow the instructions on the dye box. This is the only way you will not go wrong. Trust the directions on the box and you will see a promising result. Touching up your grays or roots at home is not tough. All you need to keep in mind is going two shades darker than what your base colour already is.
Note: Hair texture matters a lot too! If it is curly and frizzy, it will suck up the colour faster and the end result will be cooler-tones compared to warmer-hues for fine to medium hair. Happy hair, happy you!
Waxing and threading
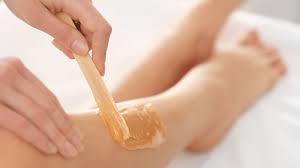

All girls know that feeling when you cannot put your most precious dress on because your body hair is not allowing it! The alternative route to salon-waxing is doing the same at home, whether it means picking up a bottle of wax from a store and following the instructions on it or simply purchasing gooey, wax strips. The key is to make sure you are in an air-conditioned room while waxing yourself. While waxing and threading, always remember that lighting matters a lot too. You need to be able to properly see the hair in order to pluck it out without hurting yourself or doing a horrendous job. One more thing to keep in mind is to always pull the wax strip in the direction the hair is growing in, or else you will be left with a half-waxed body and lots of ingrown hair. And the last thing you need to take note of is to always moisturize before starting. Waxing does not give great results on dry skin!
Blow-dry
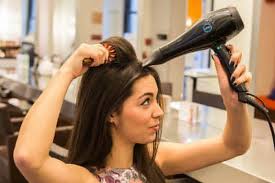
Wrap your hair in a towel right after stepping out of the shower. Remove the towel after 10 mins of letting it absorb the extra water. First, set your dryer on medium heat and high air speed and paddle dry your hair until its 70% to 80% dry. Next, gather the hair on top of your crown and tie it with a clip. Now its time to kick start the blow-drying process, which may seem like a strenuous task but isn’t when you get the hang of it! Begin with drying the lower layers with a brush, using more heat. Point the dryer’s nozzle downward to help smooth hair and create shine. Remove the clip and use it to hold the now-dry lower layers back and away. Twist and clip them into a bun to add waves, or secure like a very loose, low ponytail for a straighter look. Blow-dry the top section. Aim at the roots to add volume, then work toward the ends, using the brush to pull hair forward and out. Remove the clip. Flip all hair back. Part and dry hair around the forehead.
To curl ends, roll them under with a round brush, blast with heat, and set with cold air. For a straight finish, pull the brush through while drying ends with warm air, and set with cold air. Finish off with a hair spray!